 Because of its growing popularity, internet marketing requires you to be creative and ever-evolving. Though just a small percentage internet marketers actually succeed at it, one would still need to set themselves apart from competition. This is often achieved with aggressive branding paired with a unique style. Graphics can be taken for granted; whether on a box of cereal, a vehicle wrap, or a webpage image. Your lasting impression could mean the difference between you selling the product and the prospect moving on. This article will illustrate how to create internet banners using Canva. If you prefer designing yours to relying on replicated ones, this information is for you! Types of BannersThe world of internet graphics is vast, but for the purposes of time simplicity is the goal. Here, you will learn about the popular banner sizes and formats only. The reason is because most places that you will be wanting to place your banner will require these formats anyway. 468x60These are arguably the most used internet marketing banners. Its narrow shape allows you to slip it in between text and footer areas of websites. They resemble the following:  125x125The 125x125 marketing banners are excellent for sidebar areas of blogs and turning the smallest of spots into valuable ad real estate. Look to the right of this post to see some examples of this size of banner. Going a little deeper into sizes... What Do Banner Sizes Mean?Internet banners are typically sized by pixels and dimension. They are usually classified in a manner of width x height. The first number in the sequence represents how wide, the later represents how tall your banner stands (on the web page). This is vital to know because unless you own the website you want the banner on, you will have to abide by sizing parameters. Let's Make Banners!While there are many tools out there, I prefer to use Canva to create internet marketing banners. Not only do they provide you the means to customize the size, you can also do what you wish to the design. This also includes the ability to create GIFs and animated banners. This feature is my personal favorite. Of course, if you don't already have a Canva account, get one here. Once you do, let's go! Step 1.Inside your Canva account you will see the following header: 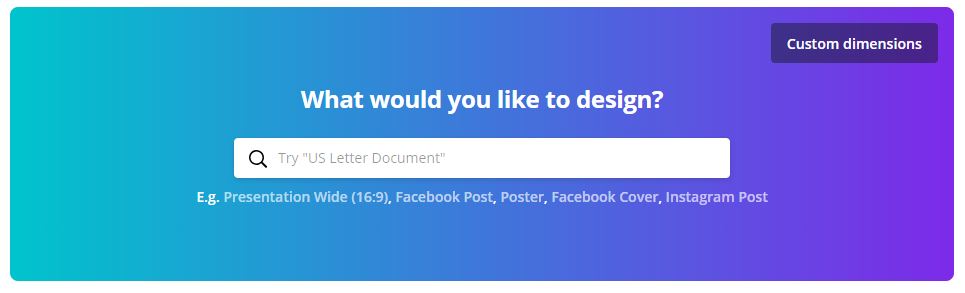 Click on that "Custom dimensions" button. You will then see a little form appear - like this: 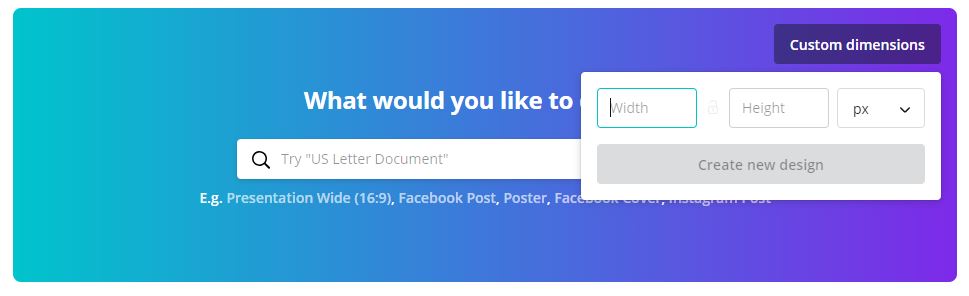 Step 2.For the purposes of one example choose the internet banner size of 468x60. Remember, this is the most popular dimension that you will see on websites.  Next, you need to click on "Create new design." Step 3.What happens next is a new tab will attempt to open. There's an emphasis on attempt because some browsers may block it. On that newly opened tab you should see a plethora of template and design options on the left. Your view should now resemble the following: 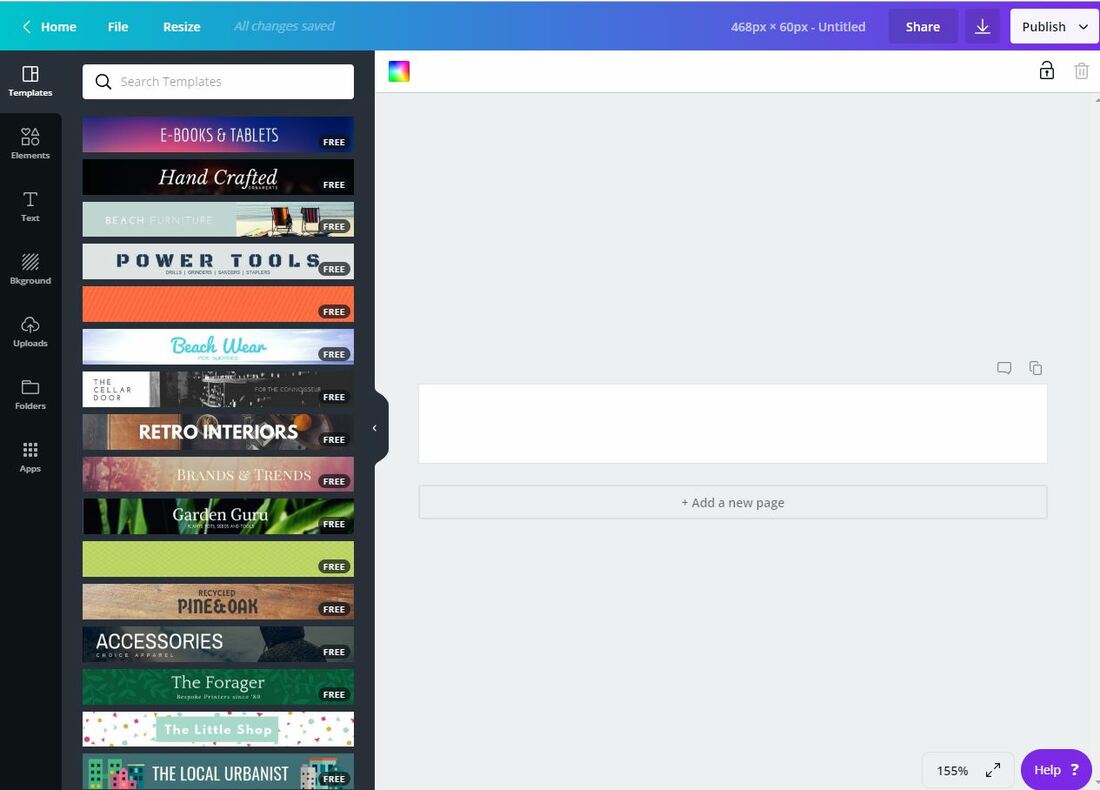 You should also notice a silhouette of the dimension that you selected in the center of the screen. You can begin with a clean slate, or you can build from one of the many 468x60 template backgrounds. Step 4.For this step I simply chose to build from a template background. All you have to do is click on your choice (from the left). That silhouette will now be populated like this:  Because this is just an example we will stick to the basics for your marketing banner. You want an enticing offer of value and a call to action (as text). It also wouldn't hurt to brand your banner with a company logo or your portrait. To accomplish these two tasks direct your attention to both the "Text" and "Uploads" buttons (on the left). The icons are circled in the image. 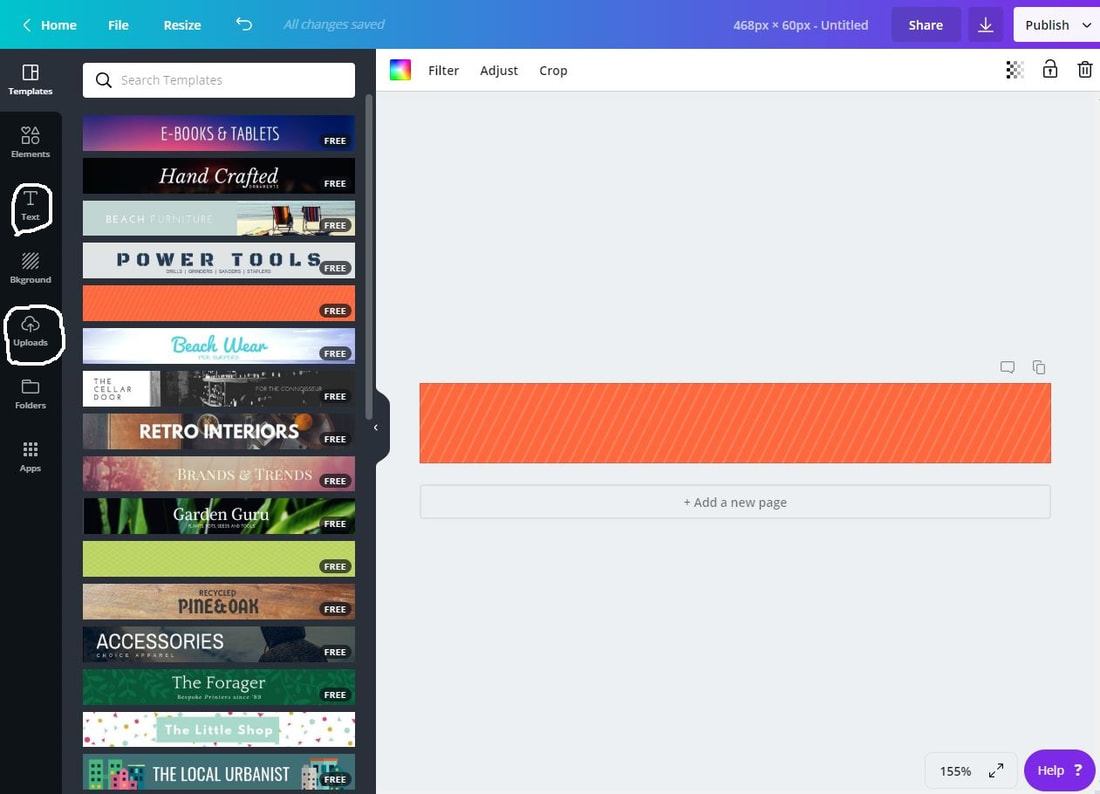 Step 5.After clicking the "Text" icon you will then have the option to pick a variety of font; header, sub-header, and body text. Experiment with each to your liking. If your message is concise and since it is a marketing banner, try the header one. You can always change, though. 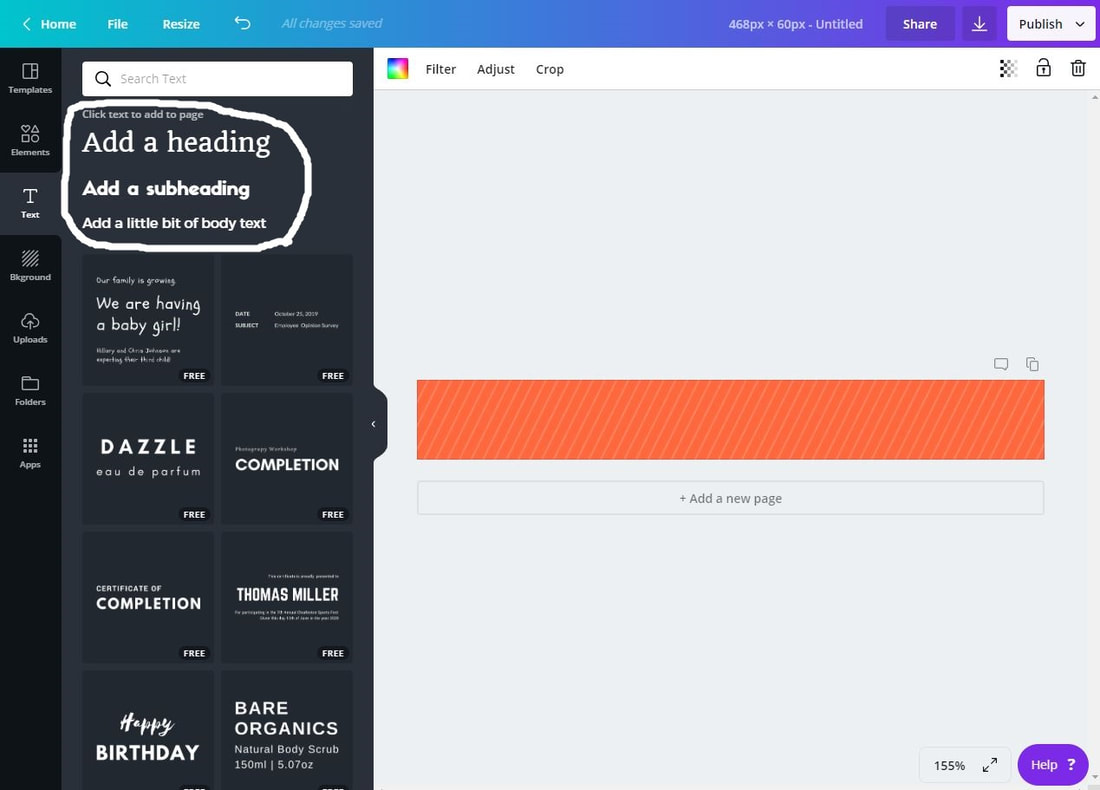 The font overlay should drop directly on your banner template like so: 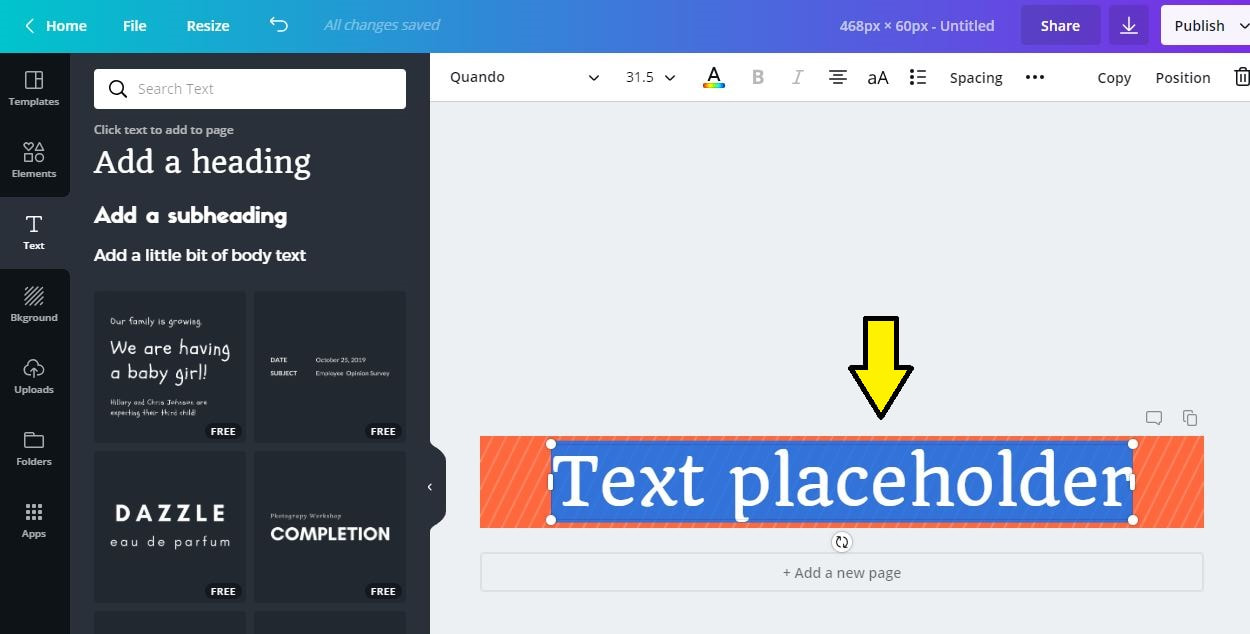 Create your verbiage and be sure to experiment with your options. You can slide your text around for the perfect centering using the guides. You can change the font color and even the font family. Do your best to capture attention online. 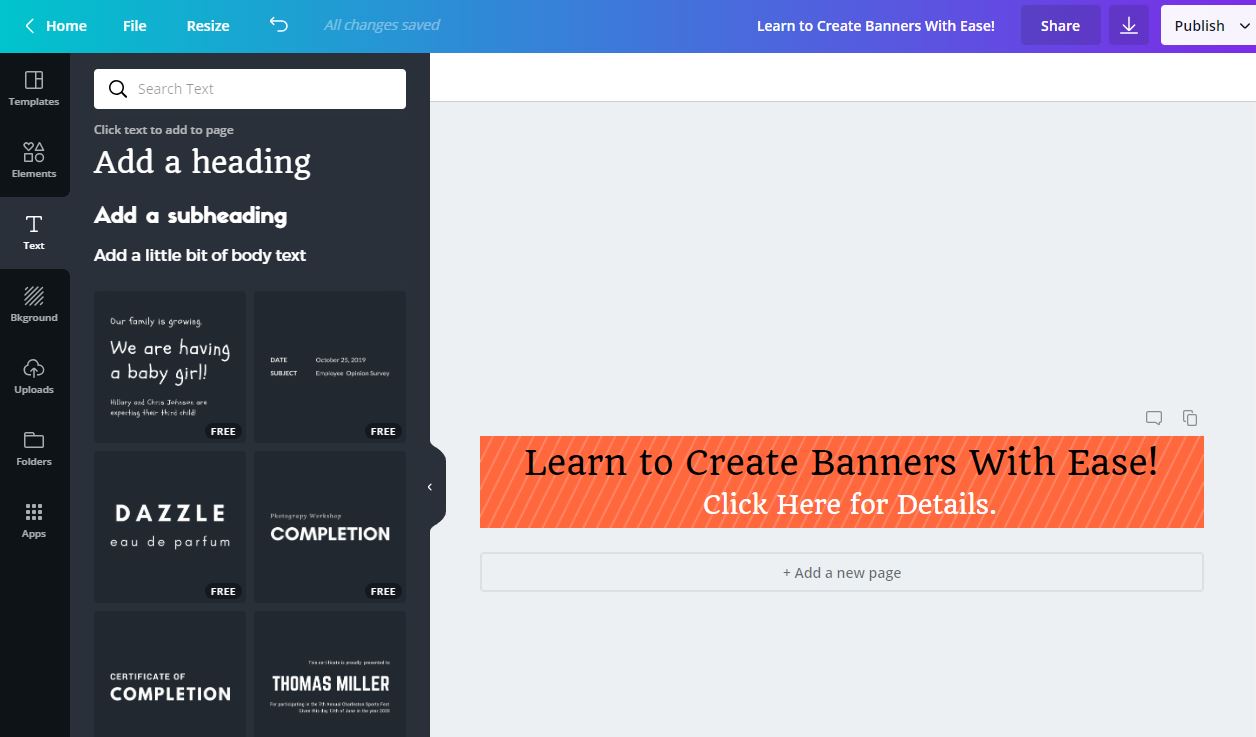 Step 6.Once done with your designing it's time to create the file and save it. I typically save them to my hard drive in a dedicated banner folder. To save, notice the arrows on the following image: 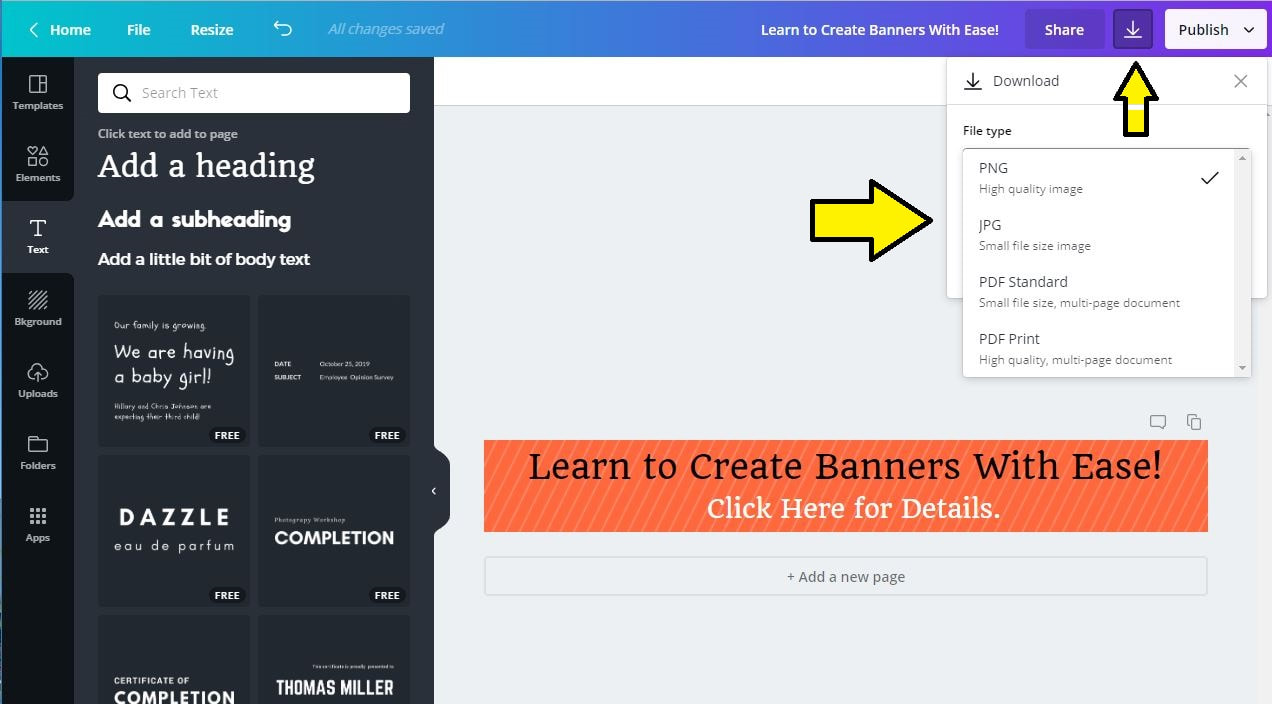 Choose your file type wisely then click the download button that appears. After doing so you will find the file in your device's Download folder. This may vary depending on the setup of your operating system. How to Add Images to Your BannerThe process to brand your banner is similar to adding text to it. This time after you click the Upload icon (on the left) your library of images should appear. If your Canva account is new most likely you will have no library. I have been using Canva for years so you will see my images in the following illustration. After selecting the image you want branded on your banner, it's overlay will appear like so: 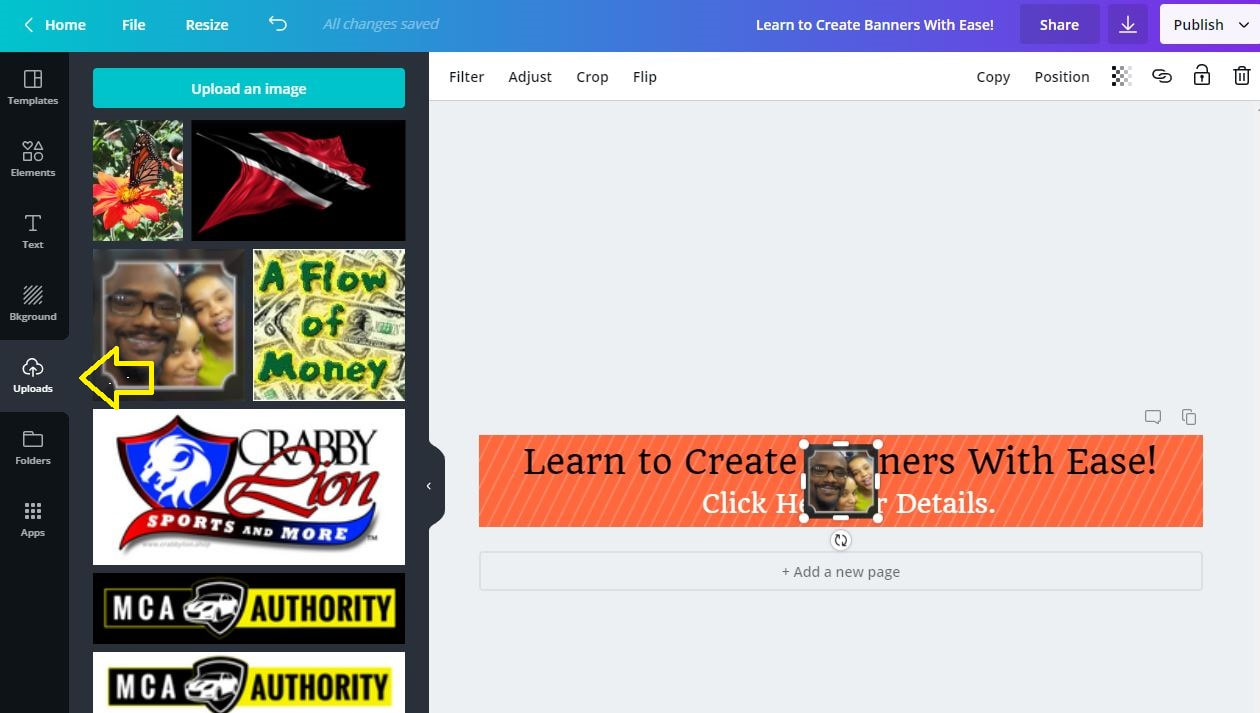 At this point your image can be dragged, re-sized, replaced, cropped, and even be turned into a watermark. Limitations are rare with Canva! If it's satisfactory, save it.

0 Comments
Your comment will be posted after it is approved.
Leave a Reply. |
Categories
All
Download a FREE Copy!
 
|
 RSS Feed
